In this article, we will talk about how to set WiFi network priority in Windows 10. On the off chance that you have various Wi-Fi networks at your place, it is more likely that you have seen your Windows 10 PC connects to just a single WiFi network automatically, regardless of whether you have saved the passwords for other WiFi networks. It is quite a useful feature as you can connect to WiFi network quickly and start browsing seamlessly. But, what if the network doesn’t have Internet access, then this feature can be frustrating as well.
This generally happens as Windows 10 PC automatically assigns a network connection priority to each of the WiFi networks you have saved. For this nuisance, the only solution you have is to either set WiFi network priority manually or stop your PC from automatically connecting to a WiFi network. You can set the WiFi network priority by executing 2 simple commands in Command Prompt.
Here’s how to do it.
How to Set WiFi Network Priority in Windows 10:
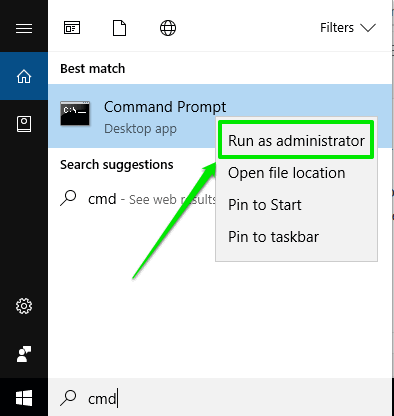
Step 1: Open Command Prompt with admin rights. You can do that by typing cmd in the Cortana search bar and then right-click on Command Prompt to open it in admin mode.
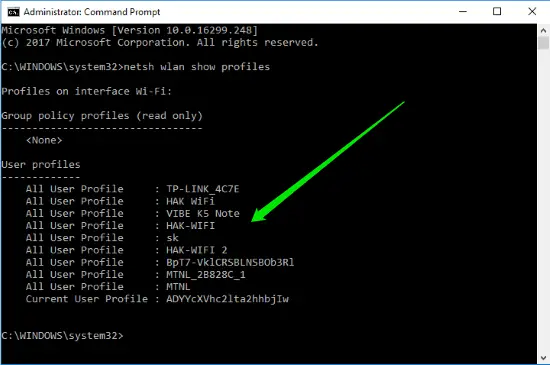
Step 2: Then execute this command: netsh wlan show profiles. This will show you the entire list of WiFi networks you have saved on your PC. The networks will be displayed in descending order of connection priority.
Step 3: Now, for changing the WiFi network priority, start off by executing this command in Command Prompt.
netsh wlan set profileorder name=”Wi-Fi Name” interface=”Wi-Fi” priority=1
You have to replace the “Wi-Fi Name” with the network name whose priority you want to set to 1.
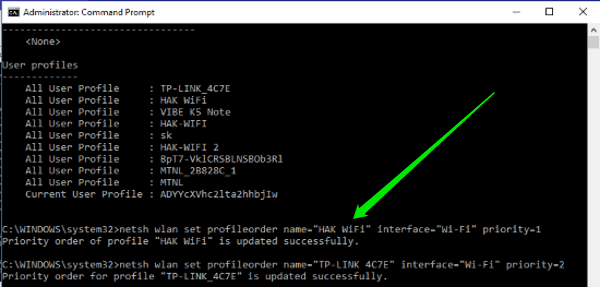
Now, for the second network preference. You have to run this command:
netsh wlan set profileorder name=”Wi-Fi Name” interface=”Wi-Fi” priority=2
You can keep doing that for all networks and set their priority in any order you want.
Step 4: The changes can now be seen in the WI-Fi Settings or else you can restart your PC and it will be visible now.
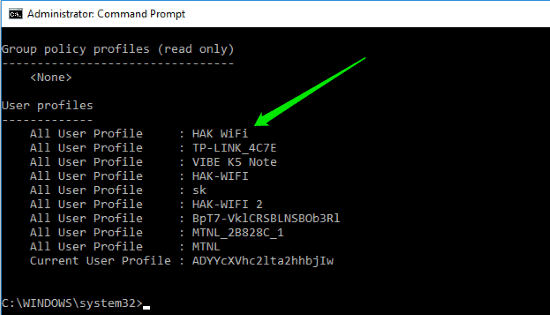
From this point onwards, when you open your PC, it will get connected to the new WiFi network whose priority you have set to “1”.
Conclusion:
This is the simple way that you can use to set WiFi network priority in Windows 10 PC. After doing that, it will save you from the agony of manually switching WiFi networks. Do leave your comments below.