In this post, we will talk about how to post on Instagram from PC or Mac with Instagram Web. Since the time, I started using Instagram, I always thought what if I can do Instagram post from PC. But, unfortunately this feature was not there on the Instagram Desktop APp or Instagram Web. So, later on many third-party services came into the rescue like SproutSocial, Buffer, etc. which allowed us to schedule and post on Instagram without using our phone. However, just like me I think every user of Instagram might have felt this craving of being able to upload photo and videos to Instagram from there PC. This can be because of various reasons like photos and videos might be more easily accessible via desktop, large interface screen, and so on.
Earlier the Instagram Web version allowed you to send and receive messages, like and comment on posts, etc. But, it didn’t had the option to post on Instagram from PC. But the wait is over now, Instagram Web now has the option to post photos and videos from Instagram Web. That means you can now upload to Instagram from your Windows PC or Mac.
You may also like:
- How to Send Instagram DM from Computer [Linux][MAC][Windows]
- How to Use Instagram Superzoom Feature
- 5 Photo Editing Trends That Will Make Your Instagram Exciting
How to Post on Instagram from PC or Mac with Instagram Web:
Step 1: To get started, the first thing you need to do is open your browser (Chrome or Safari) and go to Instagram Web. If you’re already logged in, then great or else login to your account.
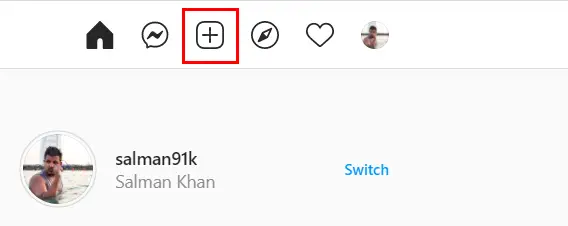
Step 2: Once you’re in, take a look at the top nativation bar. There you will see a new “+” button. Click the plus button to continue.
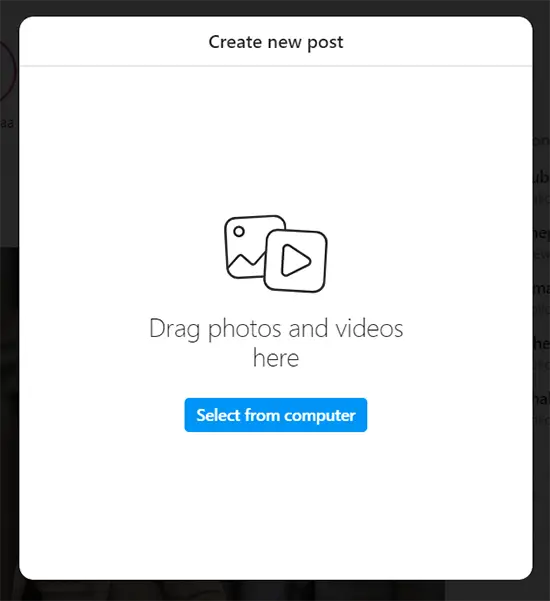
Step 3: After you click the “+” button, it will open up a popup window asking you to create a new post. You can click the “Select from Computer” button or simply drag and drop your photo or video to upload.
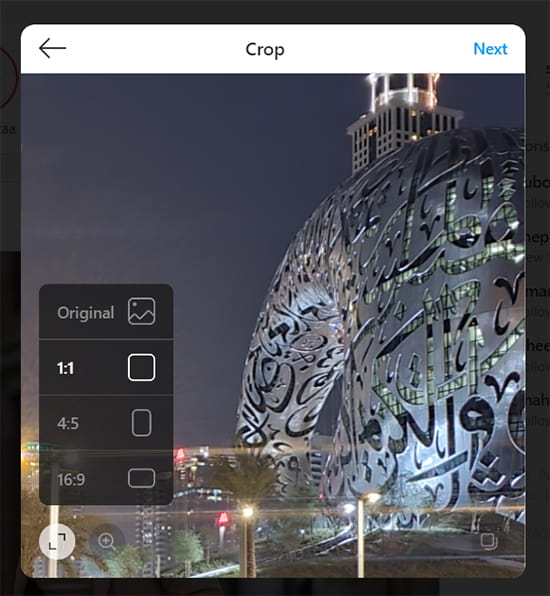
Step 4: Let’s say, you have selected a photo then you will be provided with the crop option. There are 4 crop options available including Original, 1:1, 4:5 and 16:9. You will also see a zoom option at the bottom.
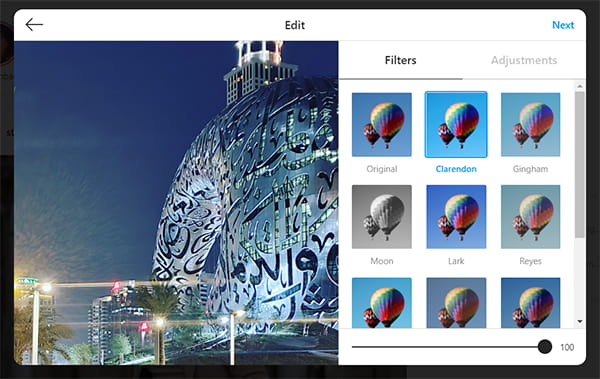
Step 5: When you’re done croppig the image, simply click the “Next” optio at the top. After that, it will open up a new popup window where you will see the options to do adjustments to your photo or apply filters.
Step 6: After you’re done editing your photo, click the “Next” button. Now, you can write your caption or add hashtags as you normally do on Instagram mobile app. You can also add location, alt text and turn off commenting on this post.
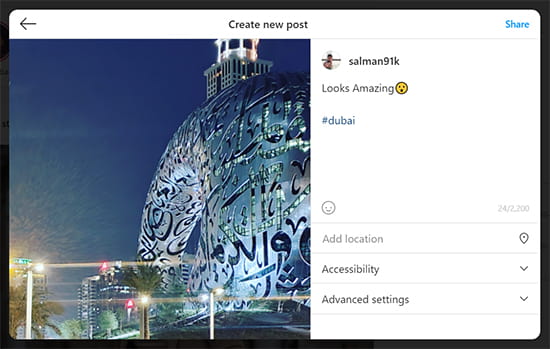
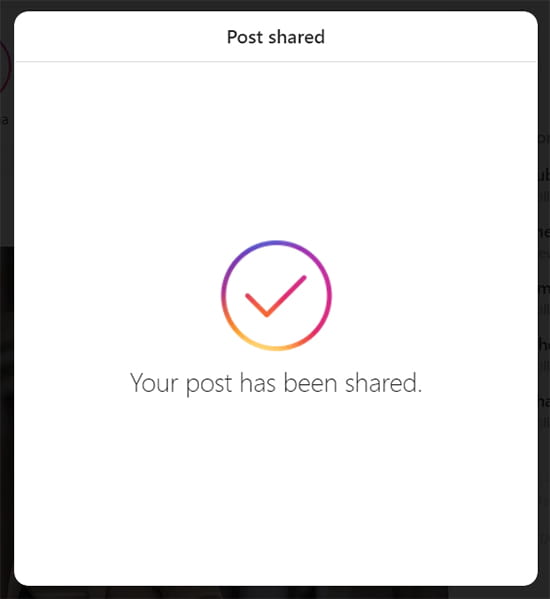
Step 7: When you’re all set, press the “Share” option at the top and your photo will be posted on Instagram. Similarly, you can upload multiple photos and videos as well. Easy Peasy!!
Conclusion:
Some people might find this feature okay, but to be honest I am very excited by seeing this feature. Most of the time, I use my laptop for storing photos and videos, and transferring them multiple times for posting on Instagram was quite irritating. Not anymore, as I can now easily post on Instagram from PC or Mac.
I hope you liked this post. Do let me know what you think in the comments below.