We all do know about the old sticky notes found in older versions of Windows like in Windows 7, 8, 8.1, and even until the V1511 version of Windows 10. But, from the V1607 version and later version of Windows 10, Microsoft turned the Legacy Sticky Notes into a Universal Windows Platform (UWP) app. The older or classic Sticky Notes data were stored in a .snt file, while the current Sticky Notes application’s data are stored in a .sqlite file.
On the off chance that you are a Windows 7 or Windows 8 user and intending to move to Windows 10, you might need to import or relocate your exemplary Sticky Notes from Windows 7 to Windows 10. This post will demonstrate to you how to change classic Sticky Notes “StickyNotes.snt” file to the new “plum.sqlite” file with the goal that you can keep on using the Windows 7 Legacy Sticky Notes on Windows 10 Sticky Notes’ Universal Windows Platform application also.

Also Check:
- How to Activate GodMode in Windows 10
- How to Clear the Wallpaper History in Windows 10
- How to Backup and Restore Installed Software in Windows 10
Here’s how it works.
How to Import Windows 7 Sticky Notes to Windows 10?
As we have discussed, it can be done by converting StickyNotes.snt file to plum.sqlite file. For doing that, you have to go through the following steps.
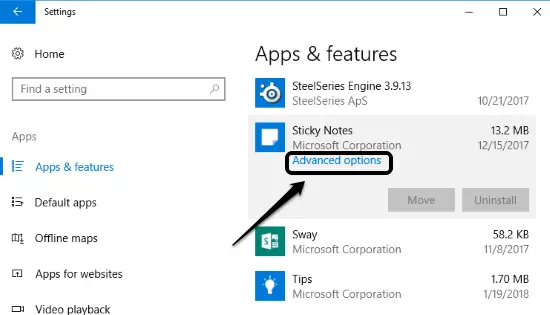
Step 1: Open your Windows 1o PC and close the Sticky Notes app. Then open the “Settings” and navigate to “Apps >> Sticky Notes >> Advanced Options“.
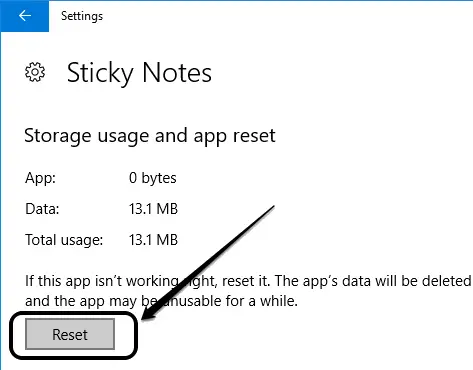
Step 2: Now, you will see the storage usage information and a “Reset” button. Click on the “Reset” button to reset the Sticky Notes apps to default. Keep in mind that the app data will also be deleted.
Step 3: Keep the Sticky Notes app closed. Now, open the Windows File Explorer and go to this location:
%LocalAppData%\Packages\Microsoft.MicrosoftStickyNotes_8wekyb3d8bbwe\LocalState\Legacy
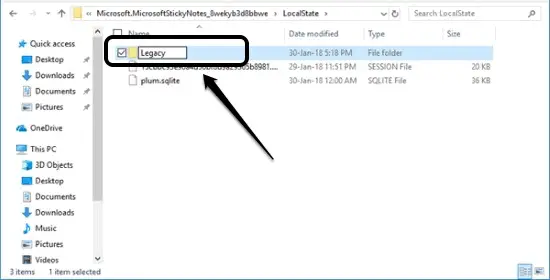
Important Notice: On the off chance that the Legacy folder does not exist, you should make this folder in the LocalState folder. After that, copy/paste the StickyNotes.snt data file from your older Windows PC to this Legacy folder.
Step 4: Here, you will now see the StickyNotes.snt file. You have to rename it into ThresholdNotes.snt. Now, launch the Sticky Notes application on Windows 10 PC and the information in the .snt file will be consequently moved to another .sqlite file.
Conclusion:
That’s all guys, this is the simplest method to import Windows 7 sticky notes to Windows 10. No major tweaking is required for doing that. Just copy paste the classic Sticky Notes file to the mentioned folder and everything is done automatically.