Here, in this post, we will see how to stop WiFi network from automatically connecting in Windows 10. When you connect Windows 10 PC to any WiFi network, it gets automatically connected when it is in range. This goes for all the connected WiFi networks to the PC. For some people, it might be useful if they are using a single network at home, office, etc. But, for some people who don’t want any WiFi network (like public hotspots) to get connected automatically, it might be frustrating. So, there is a simple solution to that and you can stop WiFi networks from connecting automatically to Windows 10.
There is an inbuilt option in Windows 10 settings which can assist you to do this. Enabling this option will tell your PC not to connect automatically to certain WiFi networks. The connection details will remain intact but instead of auto connection, you would require initiating the connection manually.
Here’s how to do it.
How to Stop WiFi Network from Auto Connecting in Windows 10?
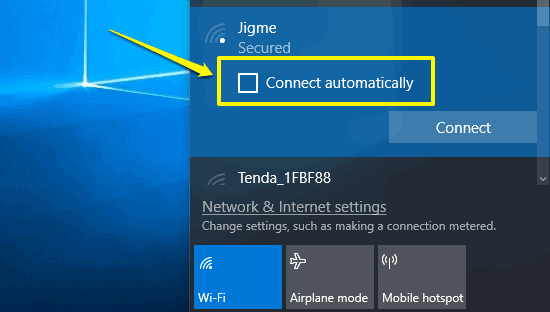
If you’re connecting to a new network, then to stop it from connecting automatically in future, you can uncheck the “Connect Automatically” box under the network name. Then connect to the WiFi network. It will never connect again on its own.
But, if you have already connected to a network without unchecking the “Connect Automatically” box, then follow these steps.
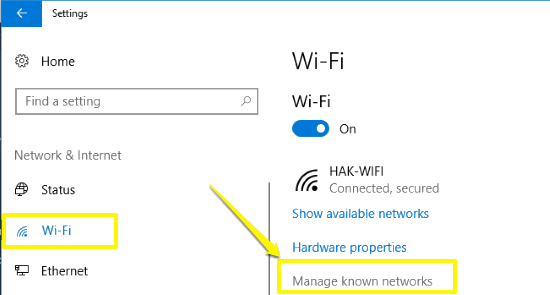
Step 1: At first, open the Settings app and head to “Network & Internet”. Then click on the “WiFi” option in the left pane and select Manage Known Networks.
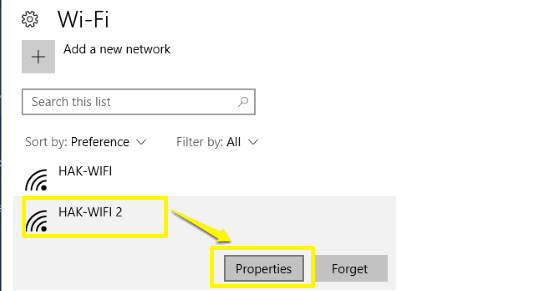
Step 2: After doing this, select the network from the list you want to edit. Then click on the “Properties” option.
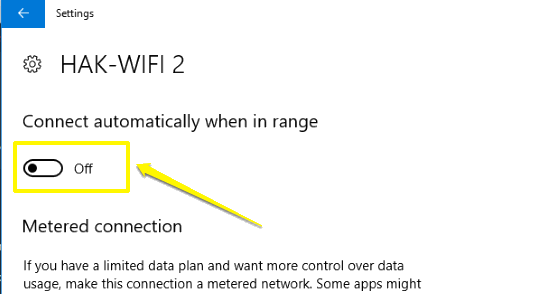
Step 3: Then you will see a slide button under “Connect automatically when in range”. Just turn it off and you’re done. That’s it, your Windows 10 PC will stop connecting automatically to this WiFi network even when it is in range. You can manually connect to it anytime without any need for re-entering the password.
Conclusion:
Now, you know how to stop a WiFi network from automatically connecting in Windows 10. This is very simple as it can be done just by turning a button to OFF. You can even stop auto connection when connecting to a new network.
Hope, it helps.
Also Read:
- How to Remove Share Option from Context Menu in Windows 10
- How to Disable Cortana in Windows 10 and Re Enable it in One Click
- How to Disable Emoji Panel in Windows 10