Here is a list of 6 free heatmap tools to generate heatmap for websites. They can be used to easily gain insight into the visitor interactions on your website with the help of heatmaps. These heatmap tools can show you where your visitors are clicking, how down they are scrolling on a page, their mouse movement over the screen, and more. Some of them let you create heatmaps manually, whereas, some can automatically create heatmaps for you. The heatmaps are recorded by the websites regardless of the devices (like desktop, mobile, etc.) the visitors are using.
These free heatmaps tools are very simple to use, as all you gotta do is get a tracking code and place it on your website. Then they will start recording the heatmaps automatically. Some of these heatmap websites can also record visitor sessions for free, provides funnels, form analytics, export & share option, and more.
Also Check:
Let us get started with the free heatmap tools for websites.
Yandex Metrica:
Yandex Metrica is one of the best free heatmap tools. You can use it to easily view heatmaps of visitors’ activities on your website like clicks, scrolling, form analysis, and more. It allows you to manually create heatmaps (as counters) for specific pages or your entire website and also shows separate heatmap for each visitor activity like click, scroll, etc. It is completely free to use and you can create and see heatmaps for as many pages or websites you want. There are many other features offered by Yandex Metrica like session replays, reporting widgets, advanced reports, and more.
How to Use Yandex Metrica to See Website Heatmap:
Step 1: To get started, visit the homepage of Yandex Heatmap and then create a new account. After that, go to the “Counters” tab and click on the “Add Counter” button. Now, create a counter by entering a name, your website address, timezone, visit timeout, etc.
Step 2: After that, the “Settings” page will open up and there you will see a counter code. Copy the code and paste it into the header of your website or into a specific page for which you want to see the heatmap.
Step 3: Once you do that, it will start recording heatmaps for your website or selected pages. To view the heatmaps, you can simply open the counter and click on the “Maps” tab on the left panel. Then you can choose from different types of heatmaps including Link Map, Click Map, Scroll Map, and Form Analysis.
Step 4: When you select any of the types, a new window will appear where you will see the heatmap. You can also switch to other heatmap types just by selecting them from the top menu. It also comes with the options to adjust the dot size, change opacity, choose date, compare segments, and more.
ClickHeat:
ClickHeat is a free and open-source service which can also show you the heatmap of visitors’ activities with ease. As the name suggests, it only logs visitors clicks on your website and shows the heatmap of the clicks only. After you place a JavaScript code on your website, it will automatically create the click heatmap for you. You can see the heatmap of clicks for as many web pages as you want for free.
How to See Visitor Clicks Heatmap with ClickHeat:
Step 1: To get started, simply download ClickHeat on your PC or clone it from GitHub. Once you do that, you would need to upload ClickHeat (after extracting the ZIP file) to your server. You can see the entire installation process here.
Step 2: When you have done that, simply open ClickHeat by entering your domain name followed by “/clickheat“. For example, if you have uploaded it to the server of a website named, “abc.com”, then you can access ClickHeat by entering “abc.com/clickheat” in your browser. After that, you would need to configure various settings for main display, heatmap rendering, login parameters, etc.
Step 3: After you’re all set with configuring the settings, you will be logged in to the dashboard of ClickHeat. Now, you will see a JavaScript code which you need to paste on the pages of your website for which you want to see the heatmap.
Step 4: Once you do that, ClickHeat will start automatically logging the heatmap of the clicks by your website visitors. You will see the heatmap on the main dashboard along with the option to sort by date, browser, screen size, etc. It also lets you adjust the transparency of the heatmap manually.
Smartlook:
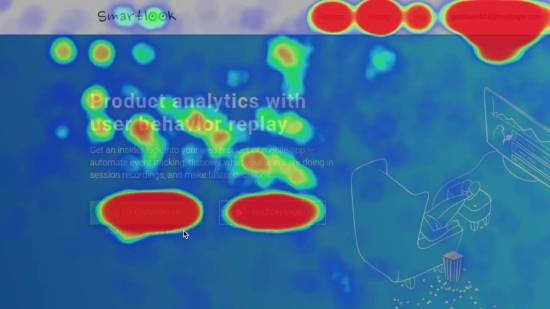
Smartlook is also one of the best free heatmap tools to view heatmaps of visitor’s interactions on web pages. It lets you generate heatmaps for clicks, mouse movements, etc. You can manually create heatmaps for specific pages on your website. The free version of Smartlook has a limitation of up to 3 heatmaps. You can view a heatmap separately for different interactions of the visitors. Similar to Yandex Metrica, this one also comes with the option to record session replays for visitor’s activities, display visitors information, and more.
How to See Website Heatmap using Smartlook:
Step 1: First, go to the homepage of Smartlook and then create a free account. Once you do that, it will generate a code which you need to place between <head> and </head> tag on your website. After that, open the dashboard and navigate to the “Heatmaps” tab.
Step 2: Now, click on the “Add heatmap” button and then enter the URL of the page for which you want to generate the heatmap. After that, it will ask you to choose the number of visits for the heatmap. Do note that the maximum visits can be up to 1000 in the free version.
Step 3: After that, save the heatmap and it will start automatically showing the interactions of your website visitors in a heatmap. You will be able to toggle the heatmap by Click, Movement, and Scroll. Apart from that, you can also sort the heatmap by devices including desktop, tablet, and mobile.
Step 4: Additionally, you will see some other details about the page like the total number of visits, clicks, etc. You will also be able to directly share the heatmap with others by clicking on the “Share heatmap” button.
HotJar:
HotJar can also be used to generate heatmaps for visitor’s interactions on your website. This one can also record heatmaps for clicks, mouse movements, and scroll on your website. This one also allows you to manually generate heatmap, but the free version lets you create only 3 heatmaps for different URLs. Apart from that, it can also record user sessions to give you more insight into visitors’ interactions. There are many other useful features available like Funnels, Forms, etc.
How to Generate Heatmaps using HotJar:
Step 1: After you sign up for a new account on HotJar, it will provide you a tracking code which you need to copy and paste into your website. Once you do that, you can proceed to create heatmaps.
Step 2: To create a heatmap, go to the “Heatmaps” tab on the left and click on the “New Heatmap” button. After that, it will ask you to give a name to the heatmap, select pageviews, set page targeting, and more. Once done, simply save the heatmap.
Step 3: Now, HotJar will automatically start recording the heatmap for the interactions of visitors. You will be able to view the heatmap under the “heatmaps” tab. You can filter the heatmap by different types including Clicks, Mouse Movements, and Scroll. Apart from that, it also allows you to toggle heatmaps by devices like desktop, mobile, etc.
Step 4: It will also show the clicks count on the page and allow you to download the heatmaps as JPEG files on your PC. To do that, click on the “Download” button visible at the top of the heatmap.
Inspectlet:
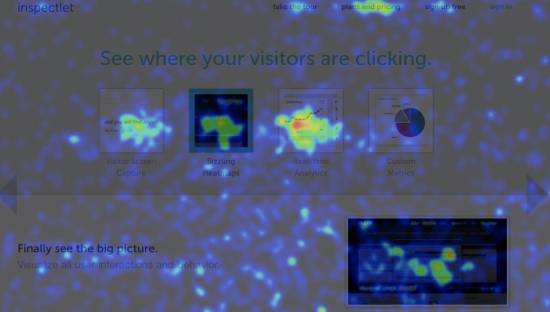
Inspectlet is another simple and useful heatmap website that can help you easily generate heatmaps for user interactions. Unlike the other heatmap websites explained above, this one doesn’t actually allow you to manually create heatmaps. Instead, it generates heatmaps automatically for the pages where you have placed the code. You can paste the tracking code into unlimited pages for generating heatmaps. But, do note that the free version has a limitation of 100 sessions and 1000 page views per month which also applies to the heatmaps. There are other features available like session replays, A/B experiments, etc.
How to View Website Heatmap using Inspectlet:
Step 1: The first thing you need to do is create a new account on Inspectlet. Then you will be given a code which you need to paste into your website’s HTML close to the <head> tag. Once done, Inspectlet will start working on your website and you can go ahead to view the heatmaps.
Step 2: Now, you can simply go to the dashboard and click on the “Heatmaps” option. After that, you will see that it has automatically created heatmaps for the homepage or wherever you have pasted the code.
Step 3: Then you can click on any of the heatmaps to view the visitor’s interactions. You will be able to see different types of heatmaps named, Eye-Tracking, Click, and Scroll. They will show you where the visitors are spending more time on your website, where they are clicking, and how long they are scrolling down.
Step 4: Not only that, you can even filter the heatmap by different devices like mobile (portrait & landscape), desktop, and tablet. You can also manually choose the date, opacity, and page state for the heatmaps.
Mouseflow:
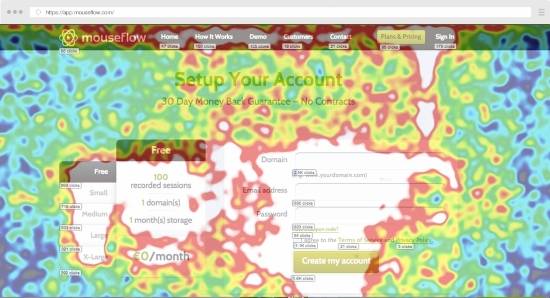
Mouseflow is another free heatmap website which you can use to view heatmaps of user interactions on your website. You can view different heatmaps for user clicks, scroll, attention, etc. Similar to Inspectlet, this one also automatically create heatmaps for you and there is no option to manually create heatmaps. It can show heatmaps for any number of pages on your website, but the free version has a limitation of only 100 sessions per month. This one also provides some additional features like user session recording, funnels, forms, etc.
How to Use Mouseflow to Generate Website Heatmap:
Step 1: First, create an account on Mouseflow and then it will give you a tracking code which you would need to place on your website between the <body> and </body> tag. After you do that, Mouseflow will be activated on your website and you can proceed to view the heatmaps.
Step 2: This one also doesn’t have any option to manually create heatmaps, but it will automatically create them for you. The heatmaps will be created for all the pages into which you have placed the tracking code. Now, to see the heatmaps, simply go to the dashboard.
Step 3: When you do that, simply click on the “Heatmaps” tab on the left panel. Then it will show all the created heatmaps and you can click on them to open. This one also lets you see heatmaps for different interaction types including Clicks, Mouse Movements, Attention, and Scroll. You can also filter the heatmaps by devices such as desktop, tablet, etc.
Step 4: There are other additional options using which you can toggle the heatmaps by custom date, change opacity, and intensity. You will also be able to share the heatmaps or download them to your PC.
Conclusion:
So, if you have been looking for a way to easily generate heatmap for websites, then you can try any of these free heatmap tools. All of these heatmap tools are pretty amazing and offer a free version with enough features for you to generate website heatmaps.
Try them out and let us know which one you liked the most in the comments section.